A Timeless Classic for Every Meal
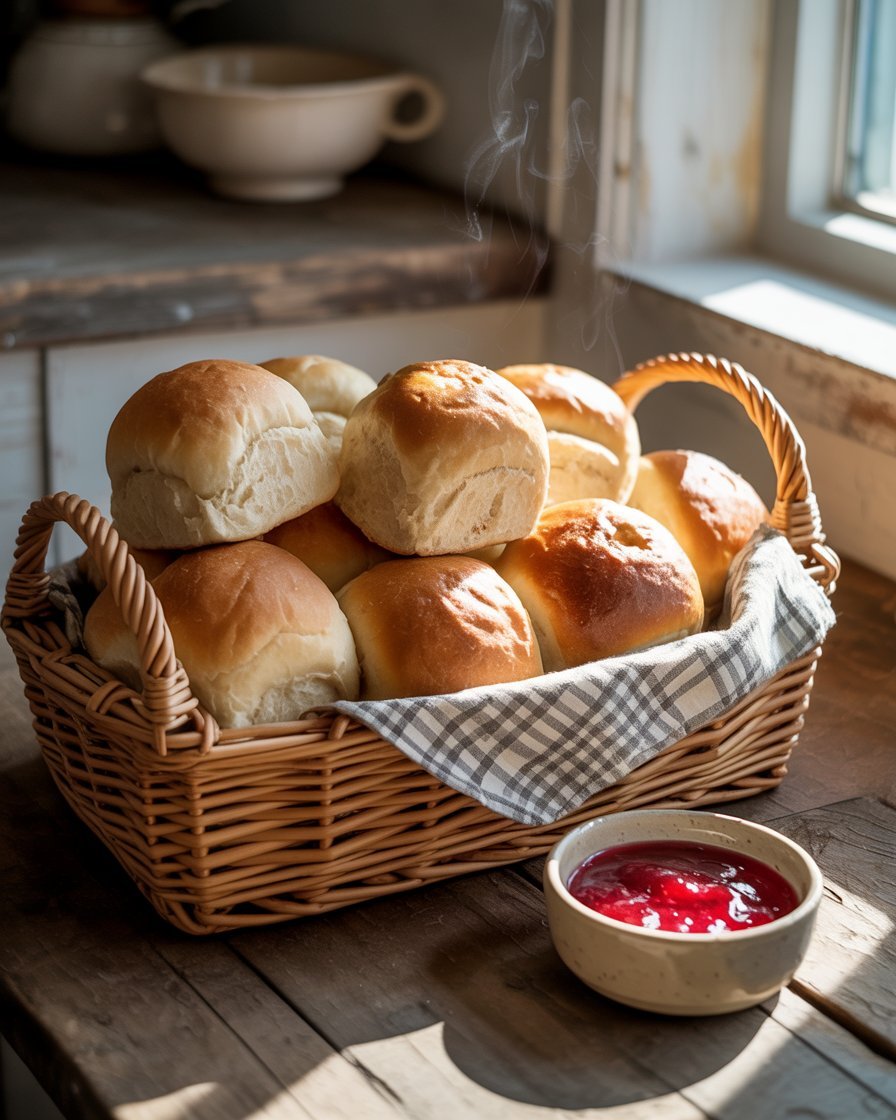
Soft dinner rolls are the perfect accompaniment to any meal, whether it’s a cozy family dinner or a festive holiday feast. These homemade rolls are flaky, soft, and buttery , making them a favorite among bread lovers. With just seven simple ingredients , you can create these delicious rolls from scratch in about three and a half hours . The result is a batch of golden brown, pillowy-soft rolls that elevate any dish they’re served with.
These dinner rolls are incredibly versatile and can be enjoyed at breakfast, lunch, or dinner . Whether you’re pairing them with hearty soups, stews, roasted meats, or simply spreading some butter on top, these rolls are sure to impress. Their light texture and rich flavor make them a standout addition to your meal, outshining even store-bought varieties.
The recipe includes detailed instructions for both beginners and experienced bakers , ensuring that anyone can achieve bakery-quality results at home. From kneading the dough to shaping the rolls and baking them to perfection, each step is designed to guide you through the process with ease. Additionally, the recipe offers helpful tips for freezing and overnight preparation , allowing you to enjoy fresh rolls whenever you need them without last-minute effort.
In this article, we will explore the full list of ingredients required, provide a step-by-step guide to preparing the rolls , and offer insights into their nutritional benefits . We’ll also cover serving suggestions, variations, and answers to frequently asked questions to help you master this classic recipe.
Ingredients for Soft Dinner Rolls
Creating soft dinner rolls requires only seven basic ingredients , making this recipe both accessible and easy to prepare. Each ingredient plays a crucial role in achieving the perfect texture and flavor. Below is a detailed breakdown of the components needed:
Essential Ingredients
| Whole Milk | 1 cup (240ml), warmed to about 110°F (43°C) | Adds richness and helps activate the yeast for proper rising |
| Instant Yeast (Platinum Yeast from Red Star recommended) | 2¼ teaspoons (1 standard packet) | Allows the dough to rise and develop a light, airy texture |
| Granulated Sugar | 2 tablespoons, divided | Feeds the yeast during fermentation and enhances flavor and browning |
| Large Egg | 1 large egg | Binds the ingredients together and contributes to the rolls’ structure and moisture |
| Unsalted Butter | ¼ cup (56g), softened and cut into 4 pieces | Adds richness and tenderness to the dough |
| Salt | 1 teaspoon | Enhances flavor and controls yeast activity |
| All-Purpose or Bread Flour | 3 cups (390g), spooned and leveled | Provides the foundation for the dough; all-purpose flour yields softer rolls while bread flour creates a chewier texture |
Optional Topping
| Melted Unsalted Butter | 2 tablespoons (28g) | Adds a buttery finish |
| Honey | 1 tablespoon | Introduces a touch of sweetness and a glossy glaze when brushed on warm rolls |
With these simple yet essential ingredients, you can create homemade dinner rolls that rival those found in bakeries. Now that you have everything ready, let’s move on to the step-by-step process of making these soft and delicious rolls.

Step-by-Step Instructions for Making Soft Dinner Rolls
Creating soft dinner rolls from scratch is a rewarding experience that results in light, fluffy, and buttery rolls perfect for any occasion. Follow these clear and concise steps to ensure success every time.
Step 1: Prepare the Dough
- In the bowl of a stand mixer fitted with a dough hook, whisk together:
- 1 cup (240ml) of warm milk (about 110°F/43°C)
- 2¼ teaspoons of instant yeast
- 1 tablespoon of granulated sugar
- Cover the bowl and let the mixture sit for 5 minutes until it becomes frothy, indicating that the yeast is active.
If you don’t have a stand mixer, you can mix by hand using a large mixing bowl, wooden spoon, or silicone spatula.
- Add the following ingredients to the bowl:
- Remaining 1 tablespoon of sugar
- 1 large egg
- ¼ cup (56g) of softened unsalted butter , cut into small pieces
- 1 teaspoon of salt
- 1 cup of flour
- With the mixer on low speed, beat the ingredients for 30 seconds , then scrape down the sides of the bowl with a silicone spatula.
- Gradually add the remaining 2 cups of flour , one cup at a time, while continuing to mix on medium speed.
- Continue beating until the dough comes together and pulls away from the sides of the bowl—this should take about 2 minutes .
- If the dough is too sticky, gradually add more flour , 1 tablespoon at a time, until it becomes manageable but still slightly soft.
Step 2: Knead the Dough
- Either keep the dough in the mixer and continue kneading for 5 minutes on medium speed, or transfer it to a lightly floured surface and knead by hand for 5 minutes .
- If the dough sticks excessively during kneading, sprinkle 1 teaspoon of flour at a time onto the dough or work surface until it becomes smooth and elastic but not dry.
- Test the dough by poking it with your finger—if it slowly bounces back, it’s ready for its first rise.
For expert-level assurance, perform the “windowpane test”: stretch a small piece of dough between your fingers. If it stretches thin enough for light to pass through without tearing, the dough is properly kneaded.
Step 3: First Rise
- Lightly grease a large bowl with oil or nonstick spray.
- Place the dough inside the bowl and turn it to coat all sides with the oil.
- Cover the bowl with plastic wrap, aluminum foil, or a clean kitchen towel.
- Let the dough rise in a warm place for 1 to 2 hours , or until it has doubled in size.
Ideal rising temperature is around 75–85°F (24–29°C). For faster rising, place the bowl near a warm oven or in a slightly warmed microwave (do not heat it).
Step 4: Shape the Rolls
- Once the dough has risen, gently punch it down to release any air bubbles.
- Divide the dough into 14 to 16 equal portions (you can eyeball the size).
- Using a bench scraper or knife, cut the dough into individual pieces.
- Shape each piece into a smooth ball by tucking the edges underneath and rolling it between your palms.
- Arrange the shaped rolls in a greased 9×13-inch baking pan , two 9-inch round or square pans , or on a lined baking sheet .
For a more uniform shape, use a kitchen scale to divide the dough evenly.
Step 5: Second Rise
- Cover the shaped rolls with plastic wrap, aluminum foil, or a clean kitchen towel.
- Allow them to rise again for about 1 hour , or until they appear puffy and nearly doubled in size.
Step 6: Bake the Rolls
- Adjust the oven rack to the lower third position to prevent the tops from browning too quickly.
- Preheat the oven to 350°F (177°C) .
- Bake the rolls for 20 to 25 minutes , rotating the pan halfway through for even browning.
- If the tops begin to brown too quickly, loosely tent the pan with aluminum foil .
- When done, the rolls should be golden brown and sound hollow when tapped on the bottom.
Step 7: Cool and Serve
- Remove the rolls from the oven and immediately brush them with the optional honey butter topping (2 tablespoons melted butter mixed with 1 tablespoon honey).
- Let the rolls cool in the pan for 5 to 10 minutes before serving.
- Enjoy them warm with butter, jam, or alongside your favorite main dishes.
By following these steps carefully, you’ll end up with perfectly soft, golden dinner rolls that are sure to become a household staple.
Nutritional Information and Benefits of Soft Dinner Rolls
While soft dinner rolls are undeniably indulgent, they also offer several nutritional benefits when consumed in moderation. Here’s a breakdown of the key nutrients per serving based on the original recipe (assuming 16 rolls):
Nutrition Facts (Per Roll)
| Calories | 150 kcal | – |
| Total Fat | 6g | 9% |
| Saturated Fat | 3.5g | 18% |
| Cholesterol | 30mg | 10% |
| Sodium | 150mg | 6% |
| Carbohydrates | 20g | 7% |
| Dietary Fiber | 1g | 4% |
| Sugars | 3g | – |
| Protein | 3g | 6% |
Key Nutritional Benefits
- Energy Source:
Each roll provides a good amount of carbohydrates , making it an excellent source of energy. This makes the rolls a great addition to meals where sustained energy is needed, such as breakfast or pre-workout snacks. - Healthy Fats from Butter:
The unsalted butter used in the dough adds healthy fats that support brain function and nutrient absorption. It also contributes to the rolls’ signature buttery flavor and tender texture . - Protein Boost from Egg and Milk:
The inclusion of egg and whole milk enhances the protein content of the rolls, making them more satisfying and beneficial for muscle repair and growth. - Rich in B Vitamins:
The milk and egg ingredients contribute essential B vitamins , including riboflavin (B2), B12, and niacin , which play vital roles in metabolism and maintaining healthy skin, nerves, and red blood cells. - Optional Honey Topping Adds Antioxidants:
Brushing the rolls with a honey butter topping introduces natural sugars and antioxidants , which may help reduce inflammation and boost immunity. - Versatile for Dietary Needs:
While the standard recipe contains dairy, it can be easily adapted for lactose-free or vegan diets by substituting the milk with plant-based alternatives and using vegan butter and egg substitutes.
Best Times to Enjoy Soft Dinner Rolls
Due to their balanced macronutrient profile and comforting nature, soft dinner rolls are ideal for various occasions:
- Breakfast: Pair with scrambled eggs, avocado toast, or yogurt bowls for a filling morning meal.
- Lunch: Serve alongside hearty soups, salads, or sandwiches for a complete midday meal.
- Dinner: Complement roasted meats, pasta dishes, or casseroles for a warm and satisfying evening meal.
- Snack or Brunch: Enjoy with spreads like hummus, nut butter, or jam for a quick snack or weekend brunch treat.
When consumed in moderation, these soft dinner rolls can be part of a well-rounded diet while providing essential nutrients and a delightful eating experience.

Serving Suggestions for Soft Dinner Rolls
Soft dinner rolls are incredibly versatile and pair beautifully with a wide range of dishes, making them a staple for any meal. Whether you’re serving them at breakfast, lunch, or dinner, there are countless ways to enjoy these buttery, fluffy rolls. Below are some of the best accompaniments and serving ideas to enhance your dining experience.
Perfect Pairings for Dinner Rolls
| Soups & Stews | Creamy tomato soup, chicken noodle soup, beef stew, lentil soup |
| Roasted Meats | Roast chicken, turkey, beef pot roast, ham |
| Pasta Dishes | Spaghetti with marinara, lasagna, baked ziti, fettuccine alfredo |
| Casseroles | Chicken and rice casserole, green bean casserole, scalloped potatoes |
| Salads | Caesar salad, garden salad, spinach salad with warm bacon dressing |
| Breakfast Items | Scrambled eggs, omelets, avocado toast, breakfast burritos |
| Sandwiches | Turkey club, grilled cheese, BLT, veggie wraps |
| Side Dishes | Mashed potatoes, roasted vegetables, stuffing, macaroni and cheese |
Creative Ways to Use Leftover Rolls
Don’t let leftover dinner rolls go to waste—there are plenty of ways to repurpose them into new and exciting dishes. Here are some creative ideas:
| Bread Pudding | Tear leftover rolls into chunks, soak in a custard mixture of eggs, milk, and cinnamon, then bake until golden for a comforting dessert or breakfast item. |
| Croutons | Cube leftover rolls, toss with olive oil, garlic powder, and herbs, then bake until crispy for homemade croutons to top salads or soups. |
| Stuffing | Dry out leftover rolls and use them as the base for homemade stuffing or dressing, especially during holidays. |
| French Toast | Dip slices of leftover rolls in beaten egg and milk mixture, then fry until golden for a decadent twist on French toast. |
| Panini or Grilled Sandwiches | Use leftover rolls as the base for toasted sandwiches filled with cheese, ham, vegetables, or avocado for a quick and tasty meal. |
| Garlic Bread | Slice rolls in half, spread with garlic butter, and broil until golden for a flavorful side dish. |
| Bread Crumbs | Pulse leftover rolls in a food processor to create fresh breadcrumbs for coating meats or adding crunch to casseroles. |
Ideal Times to Enjoy Soft Dinner Rolls
Whether you’re having a casual weeknight dinner or a special celebration, soft dinner rolls are a welcome addition to any table. Here are some of the best times to serve them:
- Breakfast: Serve warm rolls with butter, jam, or honey for a comforting start to the day. They also pair well with egg dishes and breakfast meats.
- Lunch: Include rolls in your midday meal alongside hearty soups, sandwiches, or salads for a satisfying and filling lunch.
- Dinner: Offer rolls as a side with roasted meats, pasta, or casseroles for a warm and comforting dinner experience.
- Holiday Meals: These rolls are a perfect addition to Thanksgiving, Christmas, or Easter feasts, complementing traditional mains like turkey, ham, or prime rib.
- Brunch: Incorporate rolls into your weekend brunch spread with options like breakfast sliders, avocado toast, or smoked salmon bites.
- Picnics and Potlucks: Pack warm rolls in a basket with dips, cheeses, and charcuterie for an easy and crowd-pleasing picnic or potluck option.
With so many ways to enjoy and repurpose soft dinner rolls, they truly are a versatile and beloved staple in any kitchen.
Tips and Tricks for Perfecting Soft Dinner Rolls
Making soft dinner rolls at home is a rewarding experience, but achieving consistently perfect results requires attention to detail and a few expert techniques. Whether you’re a beginner or an experienced baker, these tips will help you avoid common mistakes and ensure your rolls come out light, fluffy, and perfectly golden every time.
1. Use Fresh Yeast for Optimal Rising
One of the most critical factors in achieving well-risen rolls is using fresh, high-quality yeast . Old or expired yeast may not activate properly, leading to dense, flat rolls. Store yeast in an airtight container in the refrigerator or freezer to extend its shelf life. Always check the expiration date before use, and if in doubt, test the yeast by mixing it with warm milk and sugar—it should become frothy within 5–10 minutes.
2. Maintain the Right Dough Temperature
The temperature of your ingredients and environment plays a significant role in dough development. Ensure the milk is warmed to about 110°F (43°C) before mixing, as this activates the yeast effectively. If your kitchen is particularly cold, consider placing the dough in a slightly warmed oven (turned off) or near a warm appliance to encourage rising. Conversely, if it’s too hot, the dough may overproof and collapse.
3. Don’t Overmix or Undermix the Dough
Finding the right balance when mixing the dough is essential. Overmixing can lead to tough, chewy rolls , while undermixing results in weak gluten development , causing the rolls to be dense and uneven. Mix the dough until it forms a cohesive mass and begins to pull away from the sides of the bowl. If kneading by hand, aim for a smooth, elastic texture without excessive stickiness.
4. Knead Until the Dough Passes the Windowpane Test
Proper kneading ensures a soft, airy texture in the final product. To check if the dough has been kneaded sufficiently, perform the windowpane test : gently stretch a small piece of dough between your fingers. If it stretches thin enough for light to pass through without tearing, the gluten has developed adequately. If it tears easily, continue kneading for a few more minutes.
5. Allow Adequate Proofing Time
Both the first and second rises are crucial for developing the rolls’ light and airy structure. During the first rise, allow the dough to double in size , which typically takes 1–2 hours at room temperature. After shaping, the second rise should take about 1 hour , resulting in puffy, nearly doubled rolls. Rushing either rise can lead to denser, less voluminous rolls.
6. Shape Rolls Evenly for Uniform Baking
Consistency in shaping ensures that all rolls bake evenly. Divide the dough into equal portions using a kitchen scale or visual estimation, then shape each piece into a smooth ball by tucking the edges underneath and rolling between your palms. Placing the rolls close together in the pan allows them to rise into each other, creating a soft, cohesive texture.
7. Bake at the Correct Temperature
Baking the rolls at the right temperature ensures even browning and a soft interior. Set your oven to 350°F (177°C) and position the rack in the lower third of the oven to prevent the tops from browning too quickly. If the rolls begin to darken too fast, tent them with aluminum foil to protect them from burning while they finish baking.
8. Brush with Butter Immediately After Baking
To achieve a soft, shiny crust , brush the rolls with melted butter or honey butter as soon as they come out of the oven. This not only enhances the flavor but also keeps the crust tender and prevents it from drying out.
9. Store Properly to Maintain Freshness
Leftover rolls should be stored in an airtight container or wrapped tightly in plastic wrap to retain moisture. At room temperature, they stay fresh for 2–3 days , while refrigeration extends their shelf life to up to a week . For longer storage, freeze the rolls in a sealed bag for up to 3 months . Reheat them in a 300°F (149°C) oven for about 10 minutes to restore their warmth and texture.
By incorporating these expert tips into your baking routine, you can consistently produce perfectly soft, golden dinner rolls that are sure to impress every time.

Frequently Asked Questions (FAQs) About Soft Dinner Rolls
Making homemade dinner rolls can be a rewarding experience, but it’s natural to have questions along the way. Whether you’re troubleshooting issues with rising dough, looking for substitutions, or wondering how to store leftovers, the following FAQs will help you navigate the process with confidence.
1. Can I Use Active Dry Yeast Instead of Instant Yeast?
Yes, you can substitute active dry yeast for instant yeast, but there are a few adjustments to keep in mind. Unlike instant yeast, active dry yeast needs to be activated in warm water (or milk) before being added to the other ingredients. Simply dissolve the yeast in the warm liquid and let it sit for about 5–10 minutes until it becomes frothy. Keep in mind that active dry yeast may result in a slightly longer rise time compared to instant yeast.
2. Why Did My Rolls Turn Out Dense or Heavy?
There are several reasons why homemade rolls might turn out dense instead of light and fluffy:
- Under-proofing: If the dough didn’t rise long enough during either the first or second rise, the rolls won’t develop the necessary air pockets.
- Overmixing: Excessive mixing can lead to too much gluten development , making the rolls tough.
- Too Much Flour: Adding extra flour beyond what’s needed can dry out the dough and prevent proper rising.
- Old or Inactive Yeast: Using expired or improperly stored yeast can result in poor fermentation, leading to flat rolls.
To avoid these issues, ensure the yeast is fresh, follow the recommended proofing times, and avoid adding excess flour unless absolutely necessary.
3. Can I Make the Dough Ahead of Time or Overnight?
Yes, you can prepare the dough ahead of time or even let it rise overnight in the refrigerator . Here are two methods:
- First Rise in the Fridge: After mixing and kneading the dough, place it in a greased bowl, cover it tightly with plastic wrap, and refrigerate for up to 15 hours . When ready to proceed, remove the dough and let it come to room temperature for about 2 hours before shaping and giving it the second rise.
- Shaped Rolls in the Fridge: After shaping the rolls and placing them in the baking pan, cover them tightly and refrigerate overnight. The next day, let them rest at room temperature for 1–2 hours before baking.
Using the fridge for the first rise can actually enhance flavor development, giving the rolls a richer taste.
4. How Do I Freeze Dinner Rolls?
You can freeze both unbaked and baked dinner rolls for later use:
- Freezing Unbaked Rolls: Prepare the rolls up to the shaping stage, place them in a greased baking pan, cover tightly with plastic wrap and aluminum foil, and freeze for up to 3 months . When ready to bake, thaw the rolls in the refrigerator overnight, then let them rise at room temperature for 4–5 hours before baking as directed.
- Freezing Baked Rolls: Allow fully cooled rolls to be placed in a freezer-safe bag or container and frozen for up to 3 months . To reheat, thaw at room temperature or in the refrigerator, then warm them in a 300°F (149°C) oven for 10–15 minutes .
5. Can I Substitute All-Purpose Flour with Bread Flour?
Yes, you can use bread flour in place of all-purpose flour. Bread flour has a higher protein content, which results in a chewier texture and better structure. However, the rolls will still be soft and fluffy—just slightly different in texture. There is no need to adjust the liquid content when making this substitution.
6. What Can I Do If My Dough Is Too Sticky?
A slightly sticky dough is normal, but if it’s excessively sticky and difficult to handle, you can gradually add 1 teaspoon of flour at a time during kneading until the dough becomes manageable. Avoid adding too much flour, as this can lead to dry, dense rolls. Alternatively, use a bench scraper or lightly floured hands to manage the dough without over-flouring.
7. How Do I Know When the Rolls Are Fully Baked?
The rolls should be golden brown on top and sound hollow when tapped on the bottom . If you’re unsure, you can insert an instant-read thermometer into the center of a roll—the internal temperature should reach 190–200°F (88–93°C) when fully baked.
8. Can I Make Gluten-Free Dinner Rolls?
Yes, you can make gluten-free dinner rolls by using gluten-free all-purpose flour blends that are designed for baking yeast breads. Look for blends that include xanthan gum or add it separately to help mimic the elasticity of gluten. You may also need to adjust the liquid content slightly, as gluten-free dough tends to be wetter.
By addressing these common concerns, you can confidently prepare and customize your soft dinner rolls to suit your preferences and dietary needs.
Conclusion: Mastering the Art of Homemade Soft Dinner Rolls
Creating homemade soft dinner rolls is more than just a baking endeavor—it’s a rewarding experience that brings comfort, satisfaction, and a sense of accomplishment. These rolls, with their flaky exterior, tender crumb, and buttery aroma , are a testament to the beauty of traditional baking. Whether you’re preparing them for a special occasion, a family gathering, or simply enjoying them as a weekday treat, mastering this recipe opens the door to endless possibilities in the kitchen.
From selecting the right ingredients to understanding the nuances of yeast fermentation and dough development, each step plays a crucial role in achieving the perfect result. By following the detailed instructions, applying expert tips, and learning from common mistakes, you can consistently produce rolls that rival those from professional bakeries.
Beyond their delicious taste, these dinner rolls offer versatility in how they can be enjoyed. Whether paired with hearty soups, roasted meats, or simply spread with butter, they elevate any meal. Their adaptability also means they can be customized to fit various dietary preferences, from gluten-free versions to dairy-free adaptations , ensuring that everyone can enjoy them.
Moreover, the ability to prepare the dough ahead of time, freeze unbaked or baked rolls, and experiment with different flavors and toppings makes this recipe a valuable addition to any baker’s repertoire. Whether you’re a seasoned chef or a beginner, these rolls offer something for everyone.
Ultimately, mastering the art of soft dinner rolls is about more than just following a recipe—it’s about embracing the joy of baking, experimenting with flavors, and sharing the warmth of freshly made bread with loved ones. With practice and patience, you’ll find yourself reaching for this recipe time and time again, knowing that every batch brings you closer to perfection.